
Managing Users and Workspaces in Enterprise
With the Enterprise Plan, you gain access to powerful collaboration features — including a dedicated Admin Console to manage users and shared workspaces (previously referred to as “teams”). This structure ensures visibility, clean access control, and scalable monitoring for organizations of any size.
This guide walks you through:
- Adding and managing users
- Creating and managing workspaces
- Assigning user roles and workspace access
Accessing the Admin Console
To begin managing users and workspaces:
- Navigate to your Watchlist dashboard
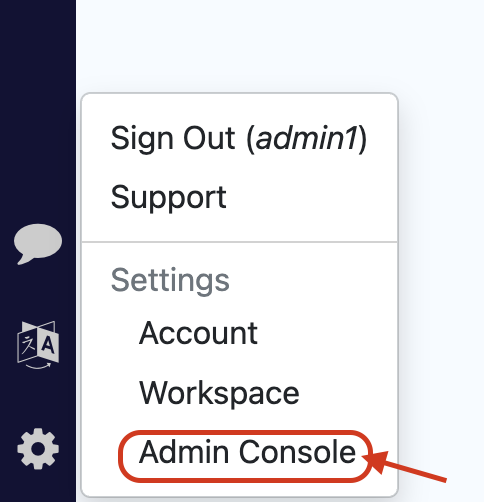
- Click the gear icon in the lower-left corner
- Select “Admin Console” from the menu
Only Admin-level users can access this section.
Managing Users
Viewing and Removing Users
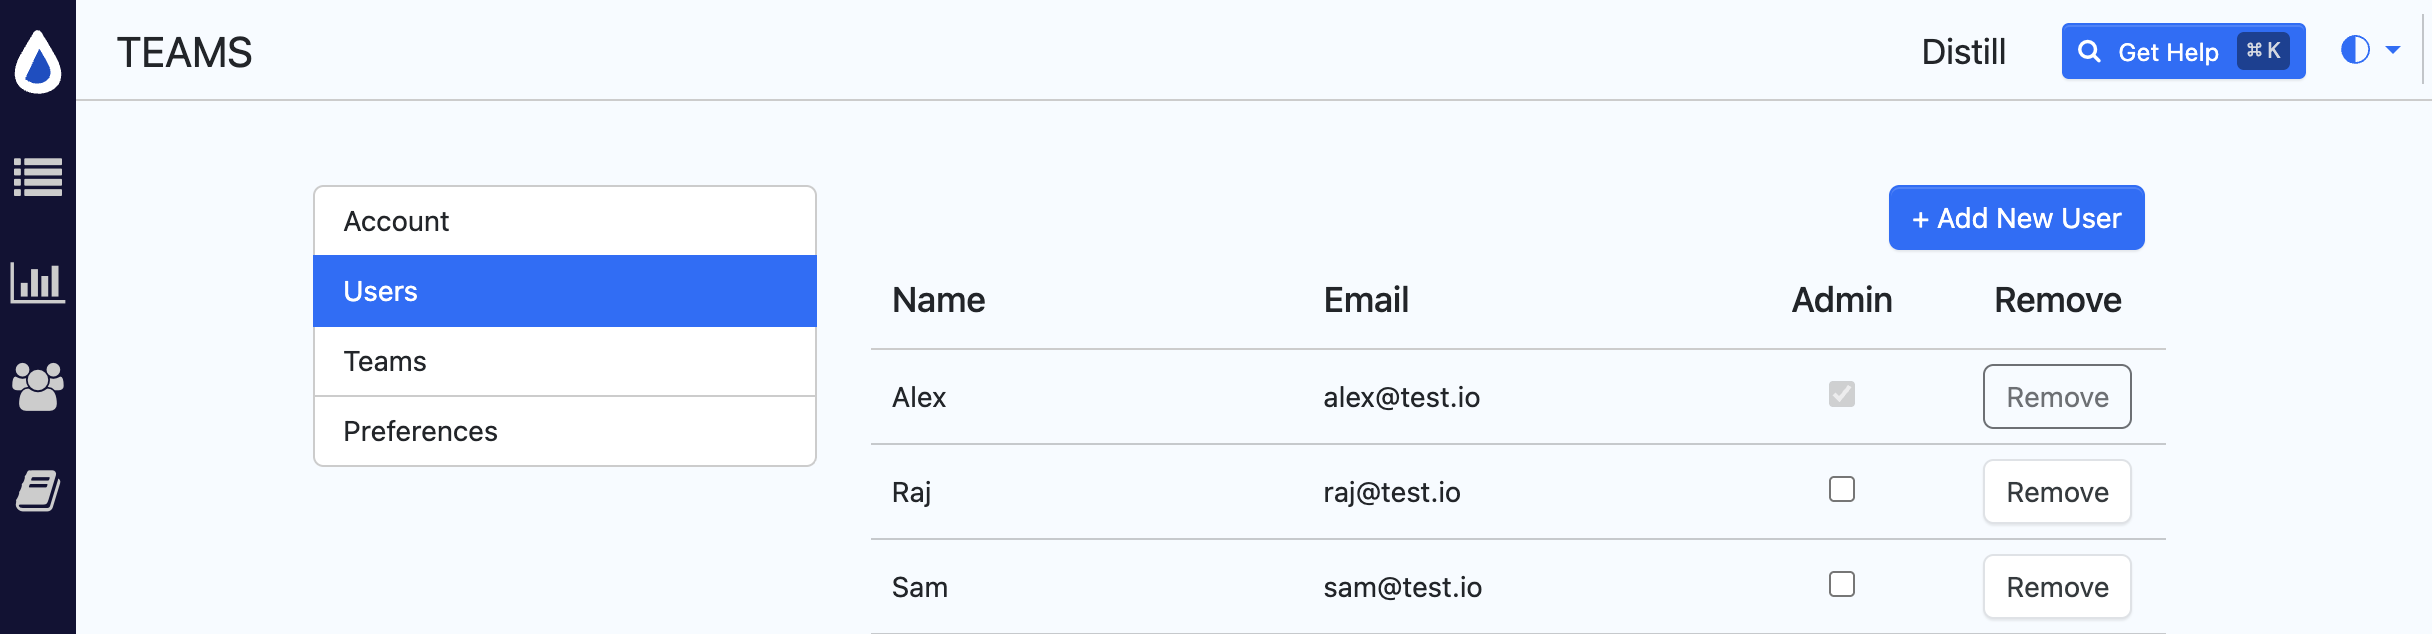
Under the Users tab in the Admin Console, you’ll find:
- A list of existing users
- Their email addresses
- Their roles (Admin/User)
- Options to Remove users when necessary
Adding a New User
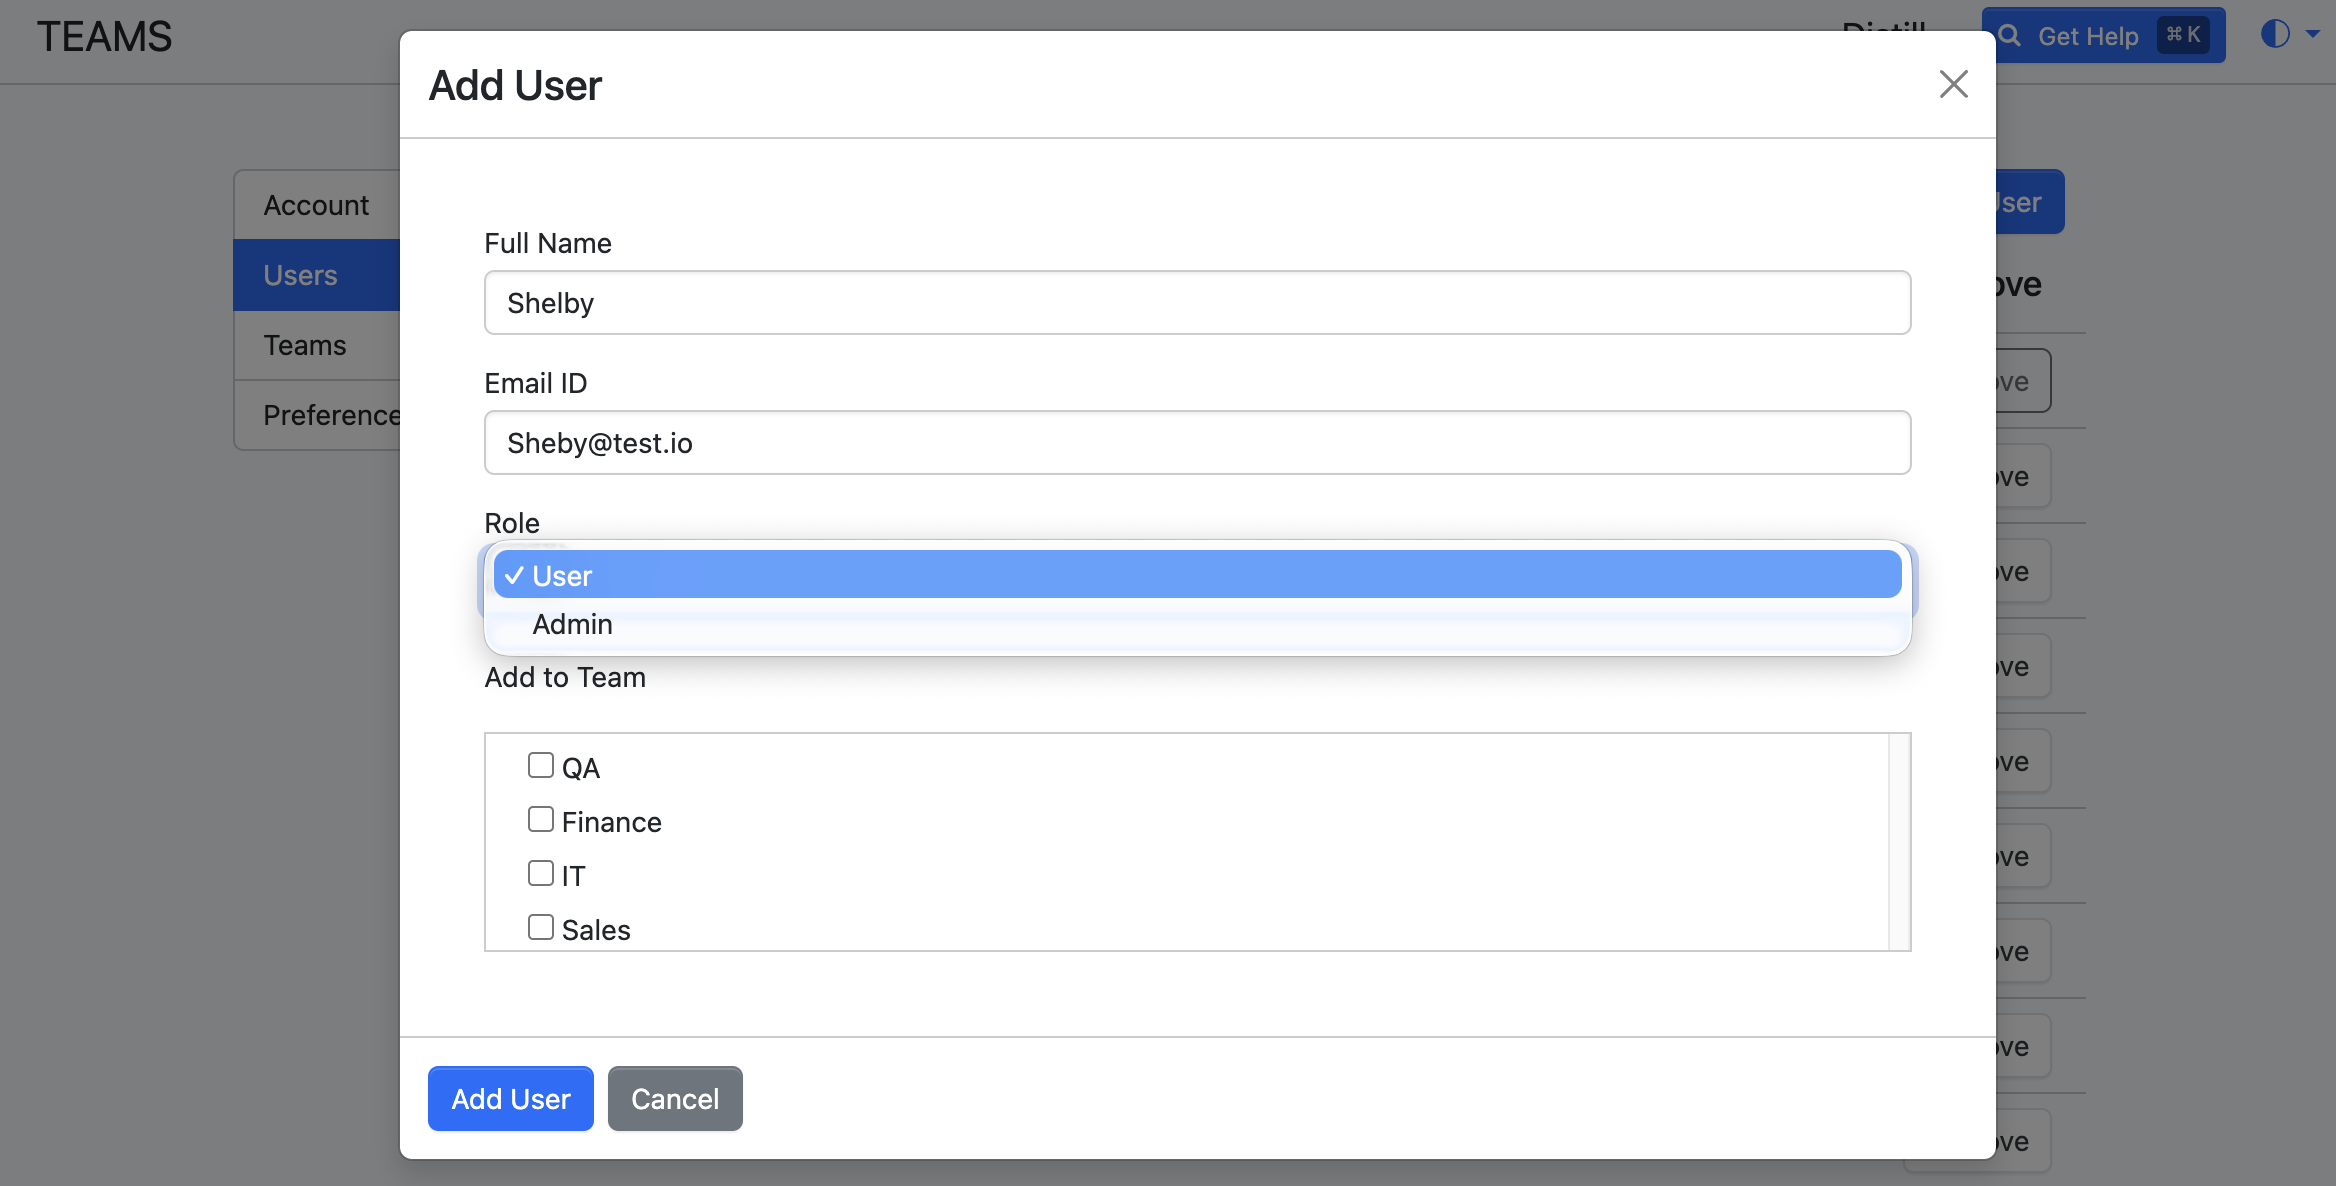
- Click “+ Add New User”
- Fill out:
- Full Name
- Email ID
- Choose Role:
UserorAdmin - Select which Teams (Workspaces) they should be added to
- Click Add User
Admins can manage both users and workspaces. Users can only access monitors inside their assigned workspaces.
Managing Workspaces
Workspaces are the foundation for collaborative monitoring in Distill. Each workspace contains its own Watchlist, permissions, and members.
Viewing Existing Workspaces
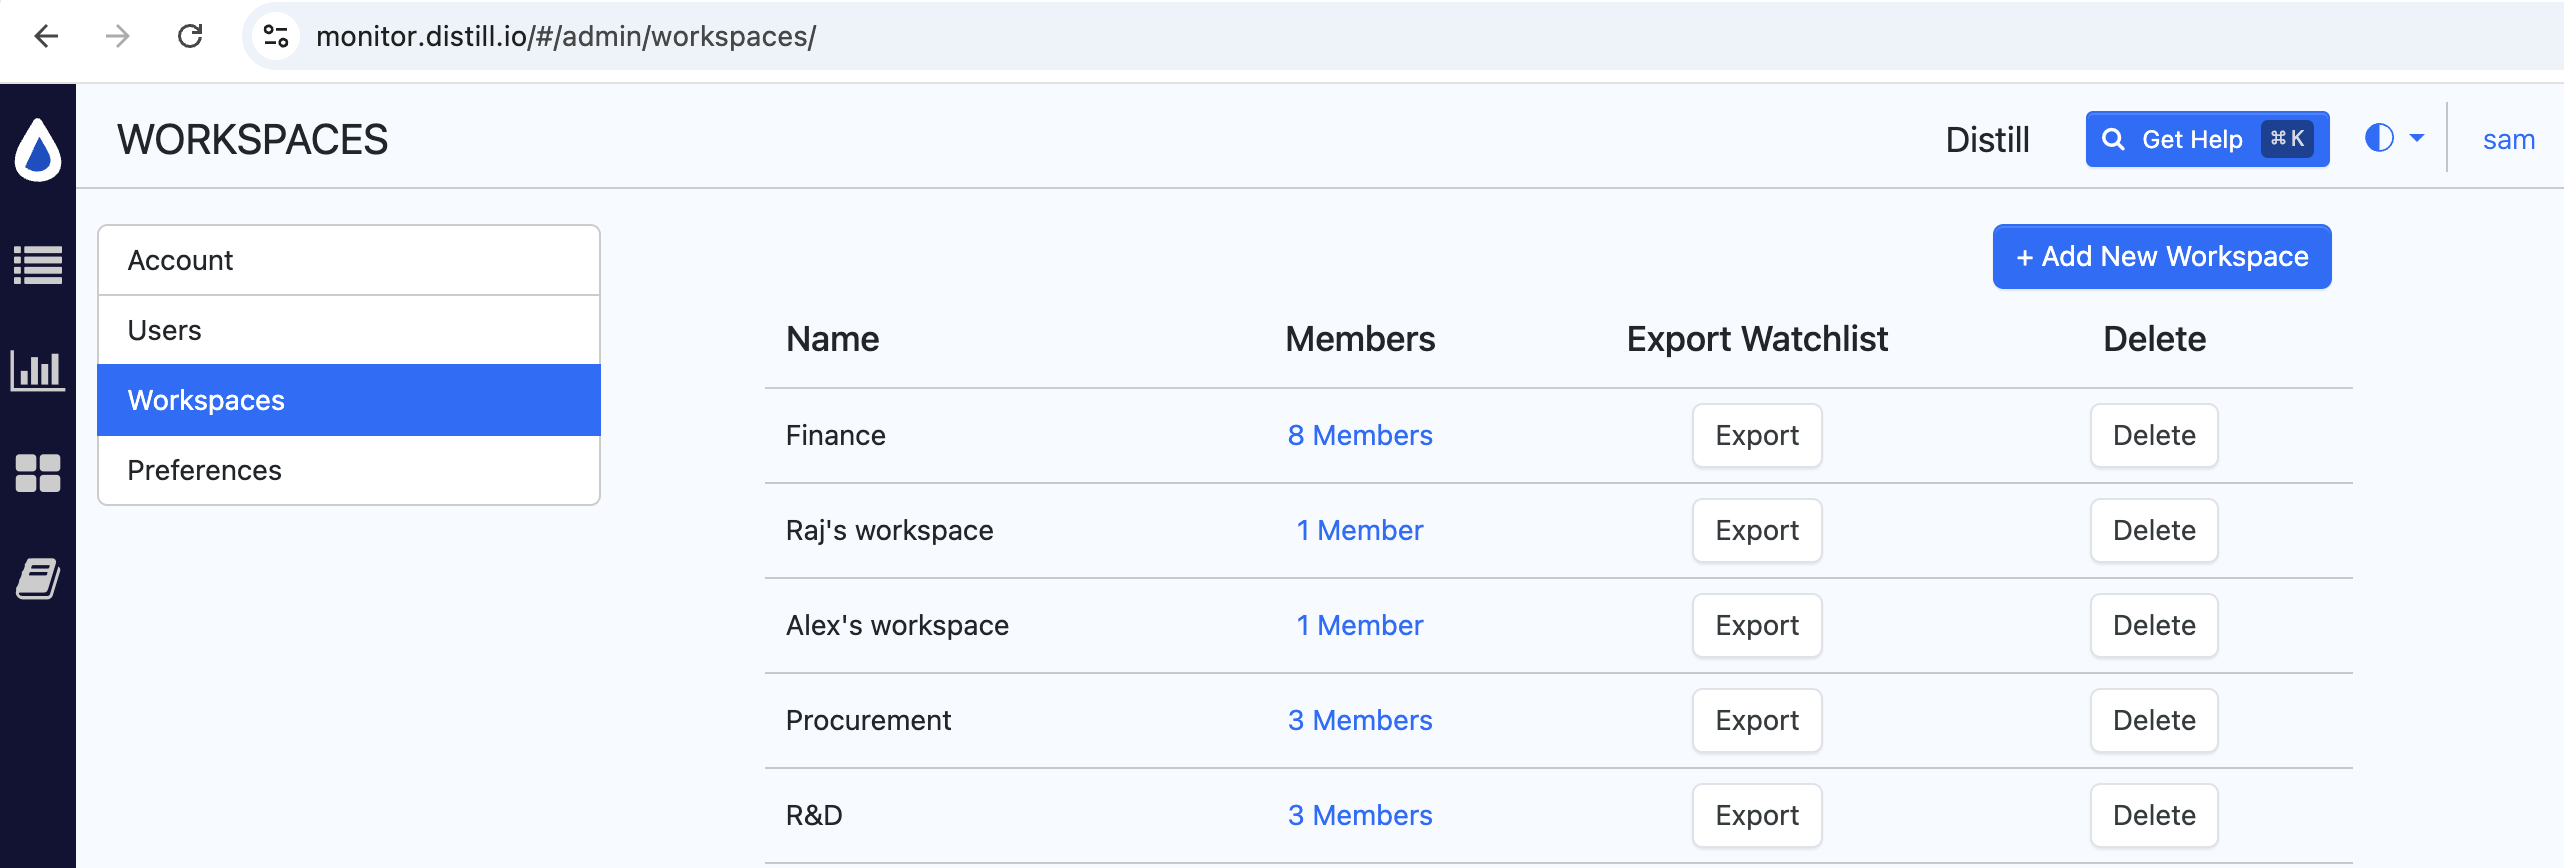
Navigate to the Workspaces tab :
- View all workspaces by name
- See how many members each has
- Options to:
- Export Watchlist (download monitor data)
- Delete a workspace
Creating a New Workspace
To set up a new workspace:
- Click “+ Add New Workspace”
- Enter a descriptive name for your new workspace (e.g., “Research")
- Click Create New Workspace
We recommend using meaningful workspace names that match business functions or departments.
Managing Workspace Members
After creating a workspace:
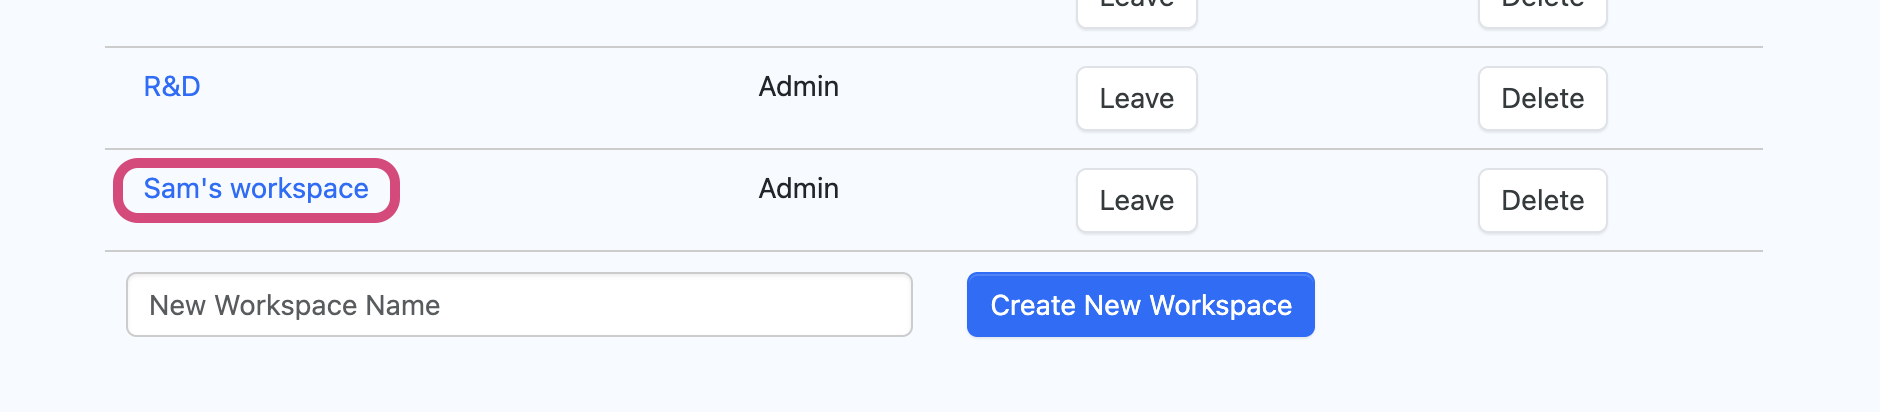
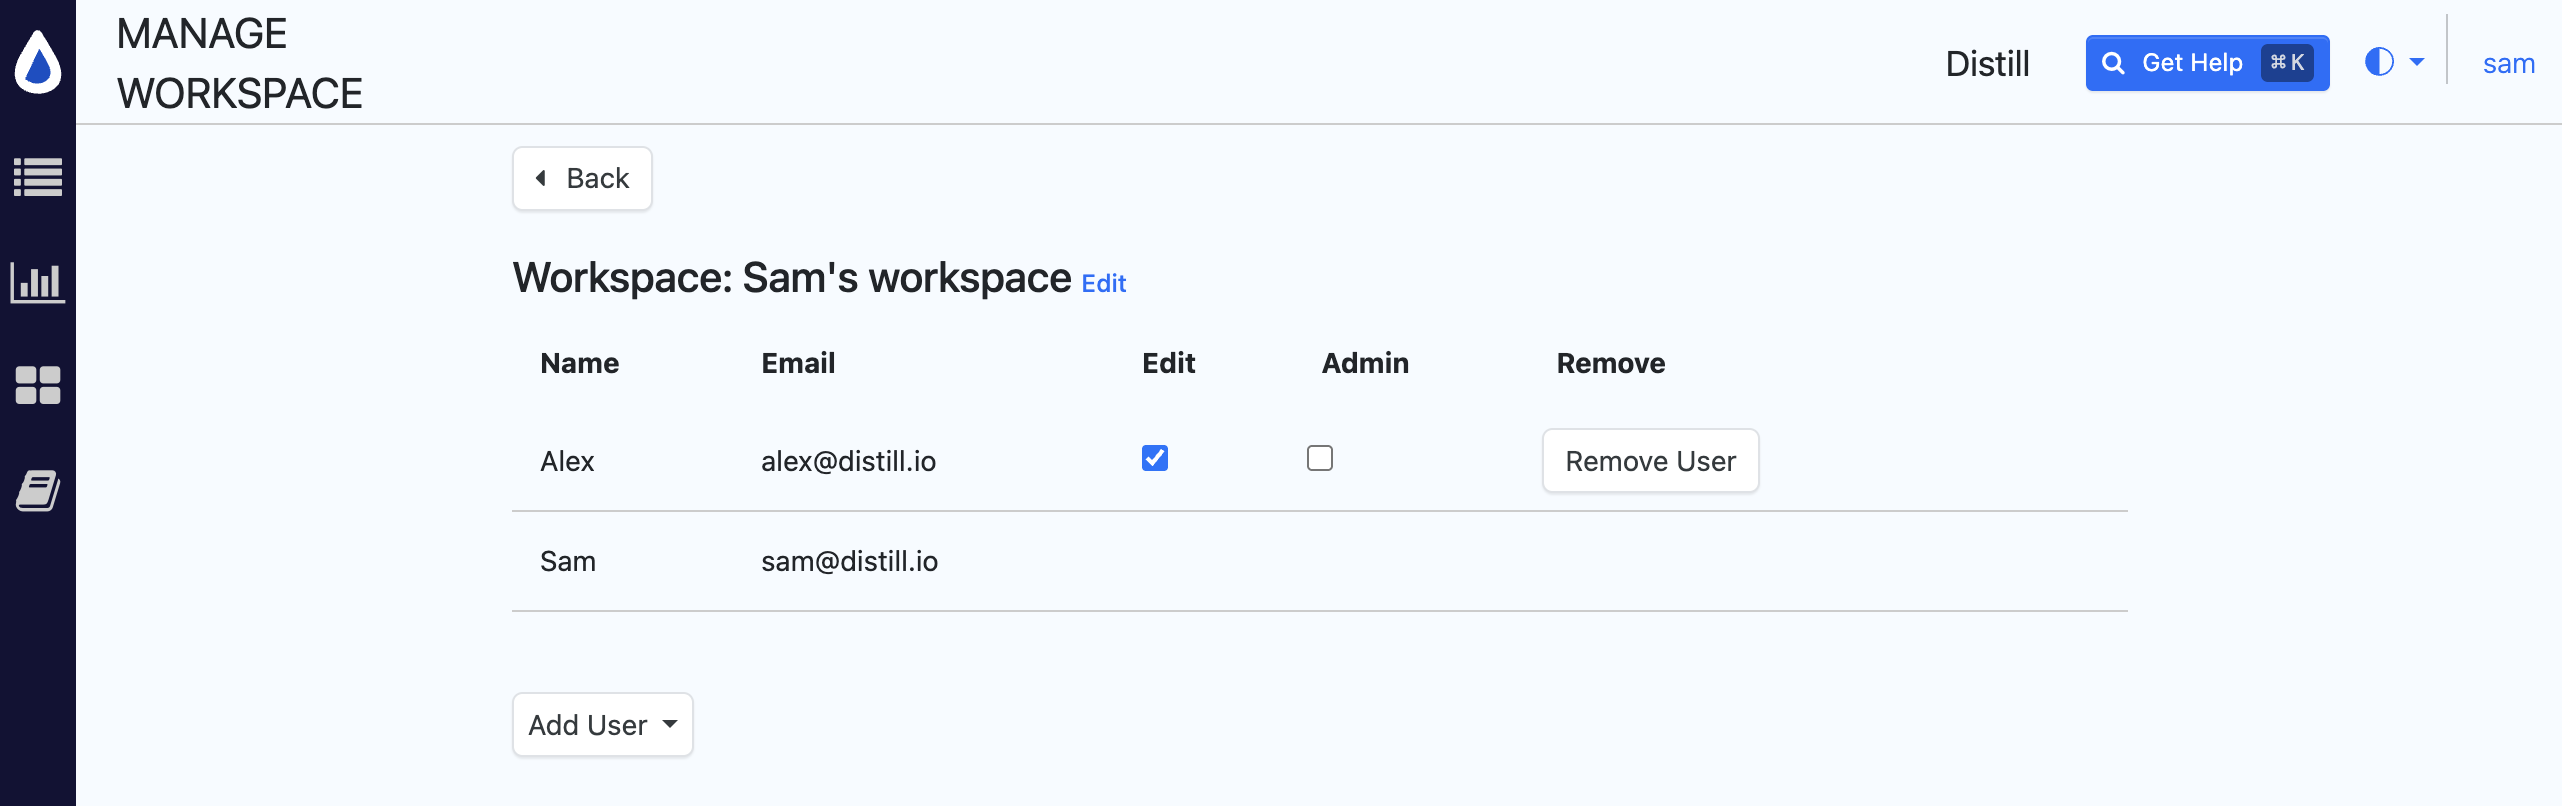
- Click the Workspace Name to enter the MANAGE WORKSPACE view
- You can:
- Add new users
- Remove users
- Assign roles (Admin, Edit access)
Alternatively, you can manage workspace members directly from the WORKSPACES view:
- Under the Members column, click the highlighted number of members for the workspace you want to manage.
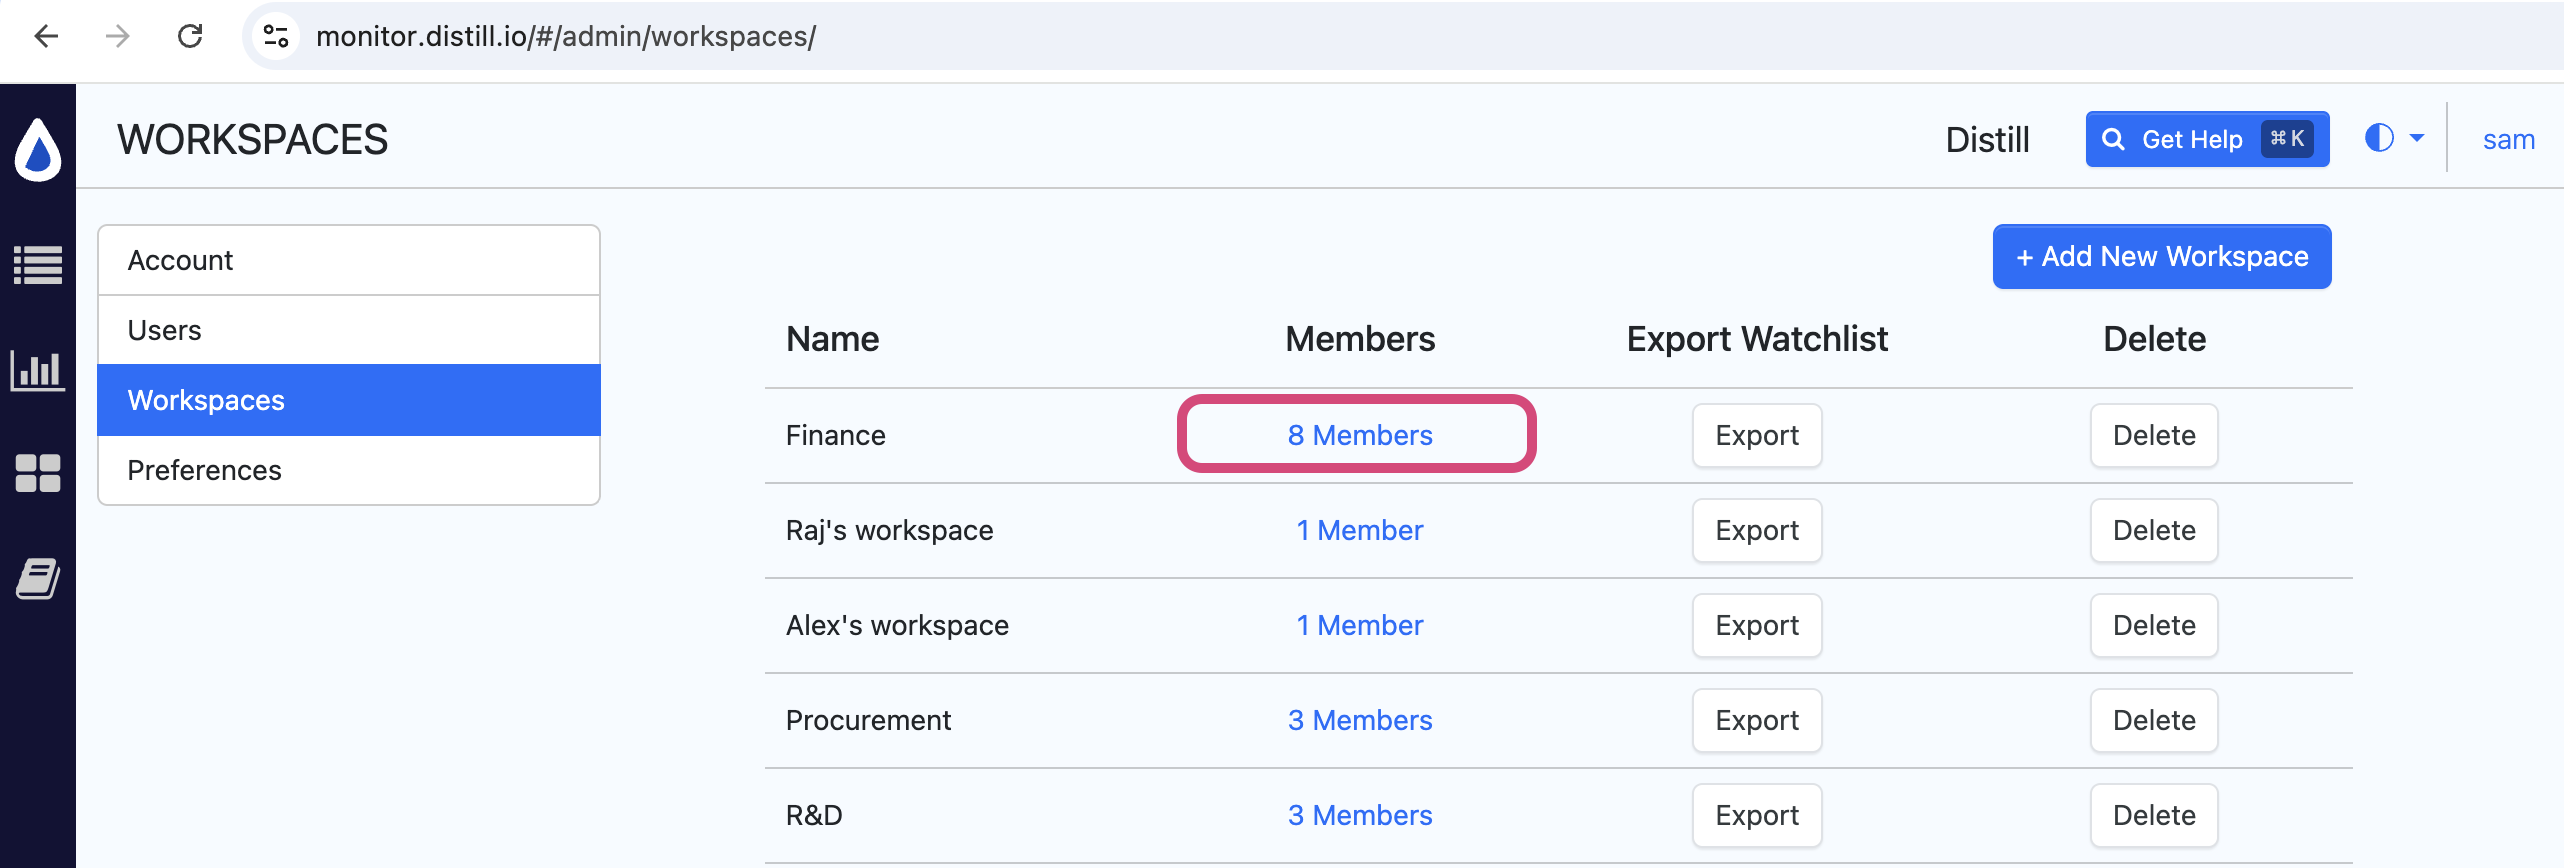
- Click Manage to open the MANAGE WORKSPACE view.
Admins can assign fine-grained control over who can edit monitors and manage the workspace.
Best Practices for Users & Workspaces
| Task | Recommendation |
|---|---|
| Naming a workspace | Use business function or department names for clarity |
| Assigning roles | Grant Admin access carefully |
| Limiting access | Add users only to relevant workspaces |
| Exporting Watchlists | Use regularly for audits and backups |
| Organizing by function | Create separate workspaces for separate projects |
Need to manage large teams or custom permissions? Contact support for assistance.